What Is COPI Crypto, and Should You Get It or Not?

What Is COPI Crypto, and Should You Get It or Not?
Even people who are quite knowledgeable when it comes to the crypto market may find it hard to keep an eye on all crypto-related news. So, don’t worry, even if you have absolutely no information about COPI crypto.
Thanks to this article, you will be able to answer several important questions such as “What is COPI crypto,” “Where to buy COPI crypto,” as well as “COPI price.”
First and foremost, Cornucopias (COPI) ‘The Island’ is a massive Play-To-Earn, Build-To-Earn, and Learn-To-Earn blockchain-based game where gamers can be rewarded with and/or own land, properties, as well as other NFT based assets with real world value all by playing games in fun and the safe metaverse.
We should mention that collectors can get lost in the metaverse where thousands of limited edition NFT-based characters will be available to buy, sell and trade. Some people may ask, “Why would anyone want to pay to play a game anymore when you could get paid to play?” It is the future of gaming.
What you should remember is that COPI is the token of the game Cornucopias. It can be used for governance. Moreover, the community will be given voting rights for participation in certain in game features.
Interesting details about Cornucopias
It is noteworthy that the Island is divided into a number of themed zones, such as the ‘Wild West’ zone, ‘Farm Life’ as well as ‘Age of the Samurai’ zone, where people have the opportunity to play a series of mini games. Moreover, people can earn digital assets as they explore and build in the game’s safe and secure world.
The team behind the Cornucopias worked hard in order to create an interesting game. It combines gaming with real-world commerce and provides opportunities for traditional and commerce companies to sell as well as promote their real-world brands, goods, and services.
The Island is available all over the world. It is built on the Unreal Engine 5 games engine, which is compatible with the PC, mobile phones, games, and smart TVs. The game will be powered, governed, and developed thanks to a growing number of communities, including blockchain, Unreal game developers, and others.
Creators, as well as players, will be able to discover a new form of currency economics where players and creators can create and trade their own NFTs in-game or on 3rd party marketplaces, and no longer will their purchased game assets be confined inside a single game chain.
What you must know about COPI

Unsurprisingly, many people want to learn about the price of COPI. For instance, you can open Google Search and type “COPI crypto price,” “where to buy COPI crypto,” or “COPI, Cornucopias (COPI) price.”
It was first tradable on 4th December 2021. More importantly, COPI has a total supply of 3,840,000,000. As of June 6, its price is $0.029104, with a 24-hour trading volume of $122,147. Moreover, the current CoinMarketCap ranking is #3837, with a live market cap of not available.
Also, the circulating supply is unavailable, and a maximum supply of 3,840,000,000 COPI coins.
This cryptocurrency has been listed on a number of crypto exchanges; unlike other main cryptocurrencies, it can’t be directly purchased with fiat money. Nevertheless, you can still easily buy COPI by first buying Tether (often called by its symbol USDT) from fiat-to-crypto exchanges and then transfer to the crypto exchange that offers to trade this coin.
How to buy COPI crypto
You have to register on a fiat-to-crypto exchange. You must buy one of the major cryptocurrencies, in this case, Tether (often called by its symbol USDT).
Moreover, you need to select fiat-to-crypto exchange for details.
We can use Coinbase, one of the most popular fiat-to-crypto exchanges.
Now, we can discuss step number two. Step number two is to buy USDT with fiat currency. Once you finished the know your customer (KYC) process, you will be asked to add a payment method.
You can choose to provide a credit/debit card or use a bank transfer. However, you will be charged higher fees when using cards; however, you will also make an instant purchase.
Without a doubt, a bank transfer will be less expensive but slower, depending on your country of residence. Moreover, some countries will offer instant cash deposit with low fees.
Feel free to click on the ‘Trade’ button at the top left, choose USDT, and confirm your transaction. Great job! You bought your first crypto.
However, we aren’t done yet. We have to convert our USDT into COPI. The cryptocurrency that we mentioned many times is currently listed on PancakeSwap.
As opposed to other centralized exchanges, the conversion steps will be a little different on PancakeSwap since it is a decentralized exchange (DEX) that doesn’t require you to register an account nor going through any KYC process.
Warning
However, trading on a decentralized exchange requires you to manage your own private key to your altcoin wallet. Moreover, it is suggested that you take extra care of your wallet’s private key. Nevertheless, if you lose your keys, you will lose access to your coins forever. Unfortunately, no customer service will help you retrieve your assets back.
Even though, if managed properly, it is, in reality, more secure to store your assets in your own private wallet compared to exchange wallets.
Convert your USDT into Binance Coin (BNB) on Binance
Do you know what PancakeSwap is? It is worth mentioning that, PancakeSwap is a decentralized exchange that is similar to Uniswap/Sushiswap, but instead, PancakeSwap runs on Binance Smart Chain (BSC). Interestingly, on BSC, you will be able to trade all BEP-20 tokens; unlike Ethereum, PancakeSwap significantly decreases the trading (gas) fees while trading on the platform.
This decentralized exchange is based on an automated market maker (AMM) system which relies on a user-funded liquidity pool, and that is why PancakeSwap can work properly without a traditional order book from centralized exchanges.
To cut a long story short, as COPI is a BEP-20 token running on Binance Smart Chain, the quickest way to buy COPI is to transfer your USDT to Binance, convert USDT into BNB, then send BNB to your own wallet via Binance Smart Chain and exchange your BNB for COPI on PancakeSwap.
Once you have registered on Binance, head over to the wallet page and choose the USDT and click on the deposit. You need to copy the USDT address and head back to Coinbase. The next move is to withdraw your USDT to this address and wait for it to arrive; this should take around 15-30 minutes, depending on the usage of the USDT network. Once arrived, trade your USDT to BNB.
The trickiest part of the process
Now, we can discuss the trickiest part of the process. You have to create your own wallet to hold both BNB and COPI. There are a number of options to create your own wallet.
However, the best option is to use a hardware wallet, such as Ledger Nano S or Ledger Nano X. It is noteworthy that they are secure hardware that provides various layers of security to protect your assets; you only need to store the seed phrases in a safe place and never put it online.
Besides, if you plan to stay in the crypto market for a certain period of time, it makes sense to get a hardware wallet.
How to create your own wallet
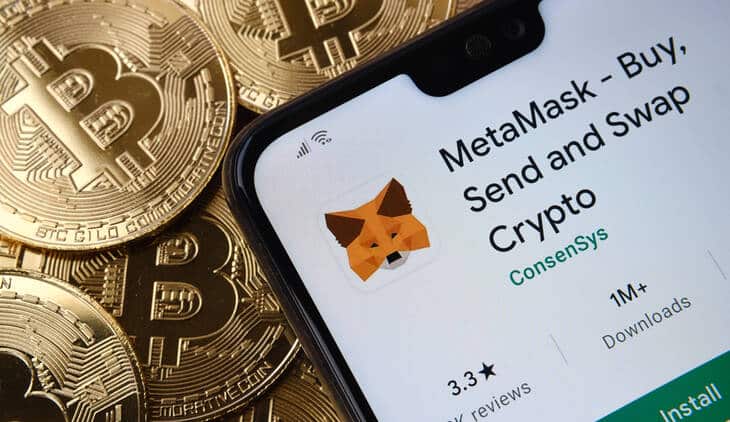
Another option is to create your own wallet; here, we will use MetaMask as an example to show how to set up your wallet.
It is recommended to use Google Chrome or Brave Browser. You have to visit Chrome’s Web Store and search for MetaMask, make sure the extension is offered at https://metamask.io for safety, and then click on the Add to Chrome.
Continue with “Get Started” and then click on the “create a wallet” on the next screen, read the instructions and then click “Agree.”
Another step is to choose a strong password to secure your MetaMask wallet; this password is not your private key or seed phrases. You only need this password in order to access the Chrome Extension.
Here comes the backup phrase generation stop; on the screen, you will see a list of random words appearing after you click on the “reveal secret words.” It is recommended to write these words down on a piece of paper and don’t save them online, anywhere.
Let’s continue; once you have saved your seed phrases securely, confirm on the next screen by verifying secret words. Congratulations! You are done.
Part two
Now you need to click on the MetaMask icon on the extension bar on the browser and unlock your wallet with your password. Notably, you should see your initial balance afterward.
Now you are ready to deposit your Binance Coin (BNB) to your wallet, head over to PancakeSwap, click on the “Connect” at the top, and choose MetaMask.
As a reminder, if this is your first time connecting with this software cryptocurrency wallet, you should be asked immediately if you want to add Binance Smart Chain (BSC) network to your MetaMask. Please do proceed with this step as you must make sure you are sending Bitcoin Coin via the right network. People should keep in mind that, after adding the network, switch to the network on MetaMask, and you should be able to notice your Binance Coin balance on the Binance Smart Chain.
Now you have to copy the address to the clipboard by clicking on the account name.
Go back to Binance or whichever crypto exchange you bought Binance Coin. You have to go to the Binance Coin wallet and select Withdraw; on the recipient address, paste your own wallet address and make sure it is the correct address; then, on the transfer network, make sure you have selected BSC or BEP20.
Last steps
Click on the submit and follow the verification steps afterward. After successfully withdrawing your Binance Coin, it should arrive very shortly to your own wallet. Now you are ready to buy COPI! Finally! Congratulations!
Importantly, head back to PancakeSwap, and select Trade > Exchange on the left sidebar.
You should notice a relatively more straightforward interface here with basically just two fields, from and to, as well as a button saying either “Connect Wallet” or “Swap.”
Choose the Connect Wallet if you haven’t done so already. Otherwise, you should be able to notice your BNB balance here at the from the field; enter the amount you plan to exchange for the cryptocurrency we mentioned many times, and then on the to field, pick COPI from the dropdown; the corresponding amount of COPI should appear immediately.
Don’t forget to verify before continuing with “Swap.” On the next screen, confirm the transaction once again by clicking Confirm Swap. Now MetaMask should appear and ask you if you want to allow PancakeSwap to spend your Bitcoin Coin; click confirm.
One of the last steps is to wait for the confirmation screen until it shows “Transaction Submitted” good job! You have finally bought COPI!!! After a while, you should be able to see your COPI balance on your MetaMask wallet.
The post What Is COPI Crypto, and Should You Get It or Not? appeared first on FinanceBrokerage.


0 Response to "What Is COPI Crypto, and Should You Get It or Not?"
Post a Comment